Drafted here for the newly-interested Coach who may have inherited a hockey team of interested players, this list is bound to increment the skillset of defense and forwards alike. Another major objective is to build the ‘Injury-Resistant Athlete’. Cross-training with other enjoyable sports is recommended, but beyond the scope of this agenda list for the hockey player.
The order of these twelve drills which follow (“DRILL AGENDA”) is merely suggested; and each can be freely changed around / modified at the discretion of the Coach / Instructor.
It is recommended that the Coach / Instructor would clearly state to each group participant about the physical health merits of performing various muscle stretching exercises always before skating onto the ice rink.
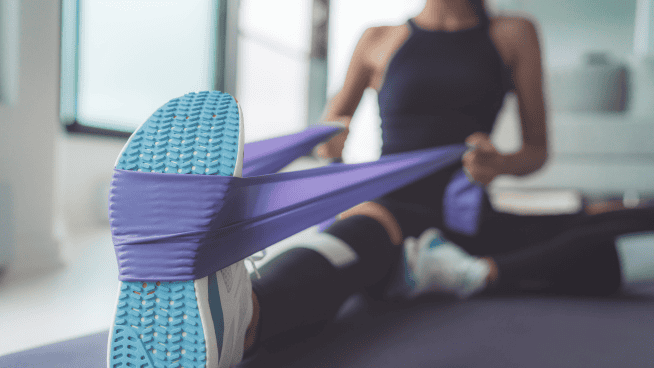
Before even hitting the ice, the following are a short list (“a thru “e”) of muscle-tendon-ligament stretches (flexions & extensions) which have been commonly known to prevent tears, sprains, and strains during the on-ice activities. These routines can be done with or without skates on. Off ice, skates can be worn on an old carpet to acclimate the ankles & legs to the increased demand of balancing on the linear plane of the skate blade. So, it is better to try these five (or more) movements on that one-eighth strip of steel, for better balance and to acclimate the ankles to that increased set of demands:
- Fencer’s stretches: To benefit the quadriceps (thigh) muscles and hamstring muscles
- Toe touches: (option: reach further down to the floor on the extra three inches added by the skates)–to benefit the lower back and abdominal muscles
- Torso twists: Keep the hockey stick at eye level horizontally in both hands–to benefit the hamstring muscles, abdominal core, and forearms
- Half-squats: Done slowly benefit the knees, calf muscles, and thighs
- Head circles: To flex the neck muscles and also reduce possible brain concussion trauma
Due to equipment’s larger shapes & heavier weight differences, the goaltenders all must develop their own variant forms of each of these physical exercises.
Instructors need to remind their groups of skaters (before any ice drills) that standing up rigidly while skating is quite incorrect. That body stance and skating motion is more likely to lead to knee and back injuries, especially during the heat of hockey play.
Every skater needs to be shown the “half-sitting” position of the skater, which lowers the center of gravity–thus helping to maintain balance in all the sudden movements/changes of direction needed. The lower that a person can stretch, the faster they can go; it’s an essential skill in beating an opponent to a loose puck.
The skater’s reach with their stick to the ice is increased by several inches as another advantage of gliding & striding a bit lower to the ice.
So, without sounding like the bossy drill sargent, many oral reminders & encouraging comments out to the skaters who are giving effort are recommended.
Drill Agenda
1. “Warm-up” forward skating.
Entire group skates around the inner perimeter of the ice rink – twice around. The first time around is at a casual pace.
“Cross-overs” during any directional turns are encouraged by the Instructor. That builds ankle strength, and the ability to stay balanced when one’s own body weight is on only one leg/skate. Such an ability to cross one ankle & foot over the other in the skating stride is an indicator of reaching a higher plateau of hockey skating skill–especially when it can be done “right over left” and “leftover right”, i.e., without favoring one side over the other.
2. Back Skate
The entire group (in line formation) skates around the inner perimeter of the ice rink – twice around. The first time around is at a casual pace. This basic ability is another plateau of skill that needs to be mastered in hockey if one ever hopes to become a player with even an average skating level. At least twenty percent of the time on the ice, a player may typically have to back skate. For the defense, this percentage can reach nearly half of their ice time. Skaters often say after the drills that back skating develops muscles that they never knew they had!
3. Skate Circles
Forward skate each of the face-off points of the rink, going around all eight circles to the far side of the rink goalposts as the endpoint. Crossovers are encouraged on skaters’ right and left sides–as Coaches / Instructors need to openly & regularly remind their skating group to do their crossovers as much as they each can.
4. Skid Stops
From base goal line to near-side blue line// red line back to near-side blue line // near-side blue to far-side blue line // far-side blue line to red line // red line to far-side base goal line. Sometimes these are called “suicides” because of the grueling amount of top speed skating and change of direction involved. This drill teaches the at-first difficult move of stopping suddenly for “the other side”. It is often said in hockey circles that how fast the skater can complete this drill determines the true skating ability of the player. Professional coaches have been known to use this drill to decide who stays with their team and who gets cut.
5. Skid stops repeated on the Opposite Side
Repeated exercise, stopping on opposite foot side as the lead (front) font.
Everyone tends to have a stronger side and a weaker side (left or right), and both sides need to be practiced so as to become second nature from either side. Mastery of the skid stop helps to reduce injury possibilities in game play, although such stopping mastery is not learned overnight.
6. Back Skating
Repeat the blue-line to the red-line pattern as with the skids, using the “V” stop to initiate the reverse direction.
Practices the harder-than-it-looks skill of moving off the balls & toes of one’s feet. This movement is not immediately learned and takes significant amounts of time to practice before even becoming concerned with how fast can someone back skate. Mastery of back skating can take many months and even years to achieve, after many hours of practice.
7. 1-on-0
From base goal line to opposite goal, skaters carry the puck up ice through obstacle cones set up at the discretion of the Instructor (indifferent/varying configurations), for an inside blue line puck shot at the goaltender’s net. This is a high-intensity benefit for both skater and the goaltender, where the skater can keep the shot on goal accurate, and not wide or high of the target net.
8. Passing to Score
2-on-0. From base goal line skate to far blue line with a partner, passing a minimum of six times, before one takes a shot just inside the far blue line on goaltender’s net. This drill really benefits the goalie on extra work, but the two skaters with the puck have to coordinate their passes back and forth well enough to not lose forward momentum.
9. 2-on-1
From base goal out to blue line, two skaters receive a puck pass with one defender skating to prevent a shot on goal. Approximately 20 seconds per group, cycling through the entire group at least twice, depending on the size of the entire group. Maybe split at both ends of the rink, with two goaltenders and a sufficient total number of skaters. This drill teaches the typical hockey scenario of moving the puck into the opposing zone. The offensive skaters need to practice accuracy in their passing back & forth, with their positioning to set up a goal score. The defender has the challenge of handling two skaters simultaneously, so needs to become more aware of positioning on the ice, not merely skating without a real strategy to thwart the attempts of the two opponents.
10. 3-on-2
From the base goal line out to the blue line, three skaters receive a puck pass with two defenses skating out to prevent a shot on goal. Approximately 20 seconds per group, cycling through an entire group at least twice, depending on the size of the entire group. Groups may be split at both ends of the rink, with two goaltenders and a sufficient total number of skaters. This drill teaches key hockey interaction, i.e. on the objective of scoring in the opposing zone, while defense practices their segment of the game which is to learn effective zone defense to narrow the odds of opponents’ scoring.
11. One-timers From Slot
Pass out from baseline to face-off circle. Skaters cycle through the position of the passer and then shooter, on at least two cycles. Groups may be split at both ends of the rink, with two goaltenders and a sufficient total number of skaters.
This drill teaches how to gauge where to contact & re-direction the moving puck for a slap shot, aiming on goal.
12. Butterfly Pass
One on one, for the shot on goal in or near the face-off circle center hash marks. Skaters cycle through the position of the shooter and then defender, on at least two cycles. Groups may by split at both ends of rink, with two goaltenders and a sufficient total number of skaters.
The butterfly pass teaches (through practice) the art of accepting a pass while skating at full speed.
For exercises #3, #4, #5, and #6 listed above, an optional timer/stopwatch can be utilized by the Coach / Instructor to create a friendly competitive Clinic environment, i.e., to mention to the group the fastest times of completion for each of these exercises, and as a form of positive recognition for those skaters who attain those fastest times in each category.
Version 2, from the original draft of 13 July 2018 by Prof P J Gammarano, Sr.; M.A., JD
RECOMMENDED FOR YOU
MOST POPULAR
Drafted here for the newly-interested Coach who may have inherited a hockey team of interested players, this list is bound to increment the skillset of defense and forwards alike. Another major objective is to build the ‘Injury-Resistant Athlete’. Cross-training with other enjoyable sports is recommended, but beyond the scope of this agenda list for the hockey player.
The order of these twelve drills which follow (“DRILL AGENDA”) is merely suggested; and each can be freely changed around / modified at the discretion of the Coach / Instructor.
It is recommended that the Coach / Instructor would clearly state to each group participant about the physical health merits of performing various muscle stretching exercises always before skating onto the ice rink.
Before even hitting the ice, the following are a short list (“a thru “e”) of muscle-tendon-ligament stretches (flexions & extensions) which have been commonly known to prevent tears, sprains, and strains during the on-ice activities. These routines can be done with or without skates on. Off ice, skates can be worn on an old carpet to acclimate the ankles & legs to the increased demand of balancing on the linear plane of the skate blade. So, it is better to try these five (or more) movements on that one-eighth strip of steel, for better balance and to acclimate the ankles to that increased set of demands:
- Fencer’s stretches: To benefit the quadriceps (thigh) muscles and hamstring muscles
- Toe touches: (option: reach further down to the floor on the extra three inches added by the skates)–to benefit the lower back and abdominal muscles
- Torso twists: Keep the hockey stick at eye level horizontally in both hands–to benefit the hamstring muscles, abdominal core, and forearms
- Half-squats: Done slowly benefit the knees, calf muscles, and thighs
- Head circles: To flex the neck muscles and also reduce possible brain concussion trauma
Due to equipment’s larger shapes & heavier weight differences, the goaltenders all must develop their own variant forms of each of these physical exercises.
Instructors need to remind their groups of skaters (before any ice drills) that standing up rigidly while skating is quite incorrect. That body stance and skating motion is more likely to lead to knee and back injuries, especially during the heat of hockey play.
Every skater needs to be shown the “half-sitting” position of the skater, which lowers the center of gravity–thus helping to maintain balance in all the sudden movements/changes of direction needed. The lower that a person can stretch, the faster they can go; it’s an essential skill in beating an opponent to a loose puck.
The skater’s reach with their stick to the ice is increased by several inches as another advantage of gliding & striding a bit lower to the ice.
So, without sounding like the bossy drill sargent, many oral reminders & encouraging comments out to the skaters who are giving effort are recommended.
Drill Agenda
1. “Warm-up” forward skating.
Entire group skates around the inner perimeter of the ice rink – twice around. The first time around is at a casual pace.
“Cross-overs” during any directional turns are encouraged by the Instructor. That builds ankle strength, and the ability to stay balanced when one’s own body weight is on only one leg/skate. Such an ability to cross one ankle & foot over the other in the skating stride is an indicator of reaching a higher plateau of hockey skating skill–especially when it can be done “right over left” and “leftover right”, i.e., without favoring one side over the other.
2. Back Skate
The entire group (in line formation) skates around the inner perimeter of the ice rink – twice around. The first time around is at a casual pace. This basic ability is another plateau of skill that needs to be mastered in hockey if one ever hopes to become a player with even an average skating level. At least twenty percent of the time on the ice, a player may typically have to back skate. For the defense, this percentage can reach nearly half of their ice time. Skaters often say after the drills that back skating develops muscles that they never knew they had!
3. Skate Circles
Forward skate each of the face-off points of the rink, going around all eight circles to the far side of the rink goalposts as the endpoint. Crossovers are encouraged on skaters’ right and left sides–as Coaches / Instructors need to openly & regularly remind their skating group to do their crossovers as much as they each can.
4. Skid Stops
From base goal line to near-side blue line// red line back to near-side blue line // near-side blue to far-side blue line // far-side blue line to red line // red line to far-side base goal line. Sometimes these are called “suicides” because of the grueling amount of top speed skating and change of direction involved. This drill teaches the at-first difficult move of stopping suddenly for “the other side”. It is often said in hockey circles that how fast the skater can complete this drill determines the true skating ability of the player. Professional coaches have been known to use this drill to decide who stays with their team and who gets cut.
5. Skid stops repeated on the Opposite Side
Repeated exercise, stopping on opposite foot side as the lead (front) font.
Everyone tends to have a stronger side and a weaker side (left or right), and both sides need to be practiced so as to become second nature from either side. Mastery of the skid stop helps to reduce injury possibilities in game play, although such stopping mastery is not learned overnight.
6. Back Skating
Repeat the blue-line to the red-line pattern as with the skids, using the “V” stop to initiate the reverse direction.
Practices the harder-than-it-looks skill of moving off the balls & toes of one’s feet. This movement is not immediately learned and takes significant amounts of time to practice before even becoming concerned with how fast can someone back skate. Mastery of back skating can take many months and even years to achieve, after many hours of practice.
7. 1-on-0
From base goal line to opposite goal, skaters carry the puck up ice through obstacle cones set up at the discretion of the Instructor (indifferent/varying configurations), for an inside blue line puck shot at the goaltender’s net. This is a high-intensity benefit for both skater and the goaltender, where the skater can keep the shot on goal accurate, and not wide or high of the target net.
8. Passing to Score
2-on-0. From base goal line skate to far blue line with a partner, passing a minimum of six times, before one takes a shot just inside the far blue line on goaltender’s net. This drill really benefits the goalie on extra work, but the two skaters with the puck have to coordinate their passes back and forth well enough to not lose forward momentum.
9. 2-on-1
From base goal out to blue line, two skaters receive a puck pass with one defender skating to prevent a shot on goal. Approximately 20 seconds per group, cycling through the entire group at least twice, depending on the size of the entire group. Maybe split at both ends of the rink, with two goaltenders and a sufficient total number of skaters. This drill teaches the typical hockey scenario of moving the puck into the opposing zone. The offensive skaters need to practice accuracy in their passing back & forth, with their positioning to set up a goal score. The defender has the challenge of handling two skaters simultaneously, so needs to become more aware of positioning on the ice, not merely skating without a real strategy to thwart the attempts of the two opponents.
10. 3-on-2
From the base goal line out to the blue line, three skaters receive a puck pass with two defenses skating out to prevent a shot on goal. Approximately 20 seconds per group, cycling through an entire group at least twice, depending on the size of the entire group. Groups may be split at both ends of the rink, with two goaltenders and a sufficient total number of skaters. This drill teaches key hockey interaction, i.e. on the objective of scoring in the opposing zone, while defense practices their segment of the game which is to learn effective zone defense to narrow the odds of opponents’ scoring.
11. One-timers From Slot
Pass out from baseline to face-off circle. Skaters cycle through the position of the passer and then shooter, on at least two cycles. Groups may be split at both ends of the rink, with two goaltenders and a sufficient total number of skaters.
This drill teaches how to gauge where to contact & re-direction the moving puck for a slap shot, aiming on goal.
12. Butterfly Pass
One on one, for the shot on goal in or near the face-off circle center hash marks. Skaters cycle through the position of the shooter and then defender, on at least two cycles. Groups may by split at both ends of rink, with two goaltenders and a sufficient total number of skaters.
The butterfly pass teaches (through practice) the art of accepting a pass while skating at full speed.
For exercises #3, #4, #5, and #6 listed above, an optional timer/stopwatch can be utilized by the Coach / Instructor to create a friendly competitive Clinic environment, i.e., to mention to the group the fastest times of completion for each of these exercises, and as a form of positive recognition for those skaters who attain those fastest times in each category.
Version 2, from the original draft of 13 July 2018 by Prof P J Gammarano, Sr.; M.A., JD


